


iPhone 7 Plus Glass Lens Screen Repair Kit + Tools + Repair Guide - Black
- Apple iPhone 7 Plus
- iPhone 7 Plus A1661
- iPhone 7 Plus A1784
- iPhone 7 Plus A1785 (Japan)
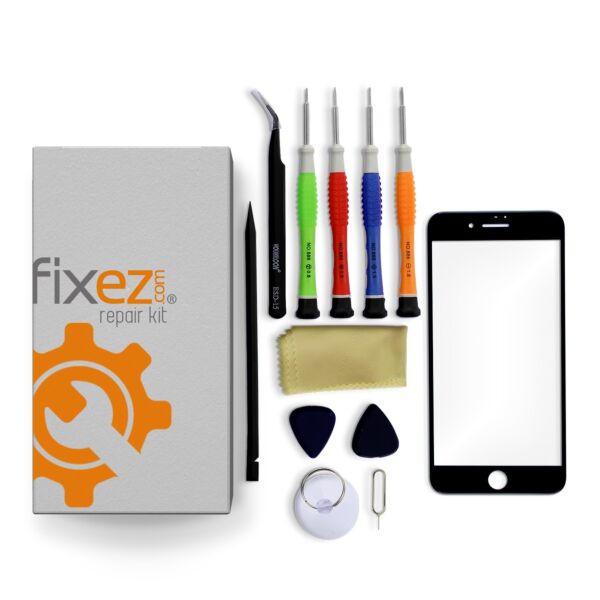
- Top quality glass lens screen repair kit for iPhone 7 Plus
- Carries all the necessary tools Small Phillips Screwdriver, Small Flathead Screwdriver, Pentalobe Screwdriver, Tri-Point Screwdriver, Plastic Opening Tools, Suction Cup, Nylon Spudger, Fine Tip Curved Tweezers, Micro Fiber Cleaning Cloth, SIM Card Ejection Tool
- Handy repair guide will guide you about each & every step of the repair process
- Manufactured specifically for iPhone 7 Plus
- Comes in a stylish black tint
Do you have a damaged iPhone 7 plus Glass Screen Lens? The only option you are left with here is the replacement or repair of the glass lens. You must be wondering about the expenses of taking the phone to a technician. Well, nothing to worry about. We have come up with an economical yet highly efficient iPhone 7 Plus black glass lens screen repair kit that will relieve you from wasting money on a technician or a repair shop. Our kit is equipped with all the tools that you need to carry out the repair work so that you don’t have to buy a single tool from outside.
Call 866-233-6460 or email [email protected] and one of our friendly USA-based agents will help you with whatever you need. Also be sure to check out our FAQs for further information and answers to common questions.
If you want to attempt the repair yourself here are Repair Instructions:
The specific repair for your device may vary.
Viewing a repair video on YouTube prior to installation is recommended:
- Apply a strip of clear packing tape across the cracked screen
- Use the Pentalobe screwdriver to remove the bottom 2 screws.
- Use the suction cup to pull up the screen and remove it from the rear case
- Carefully lift up the screen assembly, disconnect the flex cables and fully remove the screen assembly from the rear case.
- Use the heat source to slowly heat up the surface of your screen to loosen the glass adhesive
- Once the adhesive softens, slide the pry tool between the glass and frame.
- Insert the wire into to the exposed gap. Slide the wire gently down the length of the screen to safely separate the glass from the LCD.
- Insert the picks as you go to keep the screen separated from the LCD.
- Once the glass is separated, carefully clean the LCD to remove any leftover adhesive, dust or glass.
- Test fit the included double-sided adhesive onto the frame, trim if necessary. Once satisfied with the fit, remove one side of the adhesive, press firmly into place.
- Pull off the remaining adhesive backing and fit the new glass screen into place.
- Press firmly on the edges to ensure a good seal between the glass and adhesive tape.
- Watch repair videos on Youtube before attempting your repair.
Tips:
- Do not force or pry the screen apart, it could result in a damaged LCD.
- Ground yourself when repairing, you should be in a static-free environment
- Do not overheat the LCD when softening the glue on the screen with a heat source
- Keep organized, the screws are of different size and length. Mark and number the screws as you take them out to prevent damage